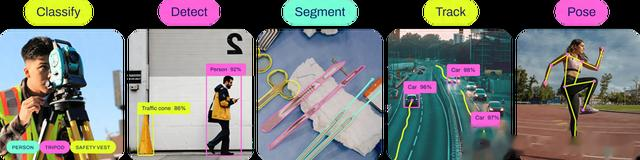
关于人体姿态检测模型,我们前期也介绍过了很多相关的模型,比如以及,而人体姿态估计一直是计算机视觉任务中比较重要的一个模型。但是基于YOLO系列的人体姿态检测模型需要较大的算力,且很难在CPU模型上快速的运行。
基于mediapipe的人体姿态检测模型,可以检测图片或者视频流中的人体姿态检测,最重要的是可以在CPU上面快速运行,且可以运行在移动终端设备上,大大提高了模型的使用。mediapipe模型的姿态检测模型包含2个模型:
Pose detection model: 人体检测模型,首先通过此模型检测输入图片或者视频中存在人体Pose landmarker model: 人体33个坐标点的标注,待检测到人体后,通过此模型进行人体33个姿态点进行备注33个坐标点如下图:

在运行本期代码前,我们需要安装mediapipe,这里只需要使用pip install安装即可。
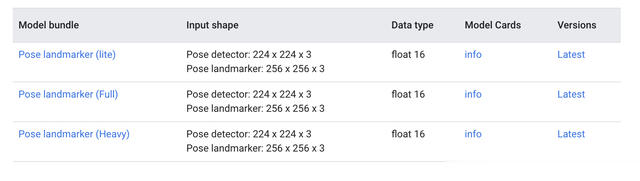
!pip install -q mediapipe==0.10.0mediapipe提供了3种尺寸大小的模型,分别是lite, full, heavy三种尺寸大小的模型,当然heavy模型精度最高,其速度就会相应的降低。可以根据自己的特点选择不同的尺寸模型。
在运行代码前,需要下载不同尺寸的预训练模型,这里只需要输入如下代码即可
!wget -O pose_landmarker.task -q https://storage.googleapis.com/mediapipe-models/pose_landmarker/pose_landmarker_heavy/float16/1/pose_landmarker_heavy.task!wget -O pose_landmarker.task -q https://storage.googleapis.com/mediapipe-models/pose_landmarker/pose_landmarker_heavy/float16/1/pose_landmarker_full.task!wget -O pose_landmarker.task -q https://storage.googleapis.com/mediapipe-models/pose_landmarker/pose_landmarker_heavy/float16/1/pose_landmarker_lite.task下载完成后,放置在自己的项目文件夹
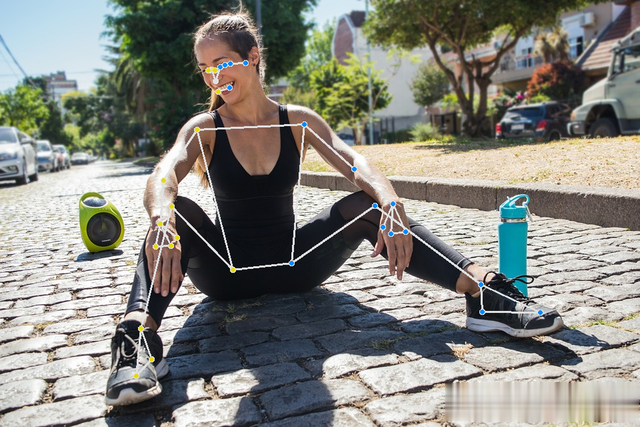
import cv2img = cv2.imread("image.jpg")模型支持输入图片或者视频,以及视频流。这里我们先加载一张图片,来进行图片中的人体姿态检测。由于mediapipe输出的是人体的33个坐标点,这里需要建立一个可视化函数来进行人体姿态检测的可视化显示
from mediapipe import solutionsfrom mediapipe.framework.formats import landmark_pb2import numpy as npdef draw_landmarks_on_image(rgb_image, detection_result): pose_landmarks_list = detection_result.pose_landmarks annotated_image = np.copy(rgb_image) for idx in range(len(pose_landmarks_list)): pose_landmarks = pose_landmarks_list[idx] pose_landmarks_proto = landmark_pb2.NormalizedLandmarkList() pose_landmarks_proto.landmark.extend([ landmark_pb2.NormalizedLandmark(x=landmark.x, y=landmark.y, z=landmark.z) for landmark in pose_landmarks]) solutions.drawing_utils.draw_landmarks( annotated_image, pose_landmarks_proto, solutions.pose.POSE_CONNECTIONS,solutions.drawing_styles.get_default_pose_landmarks_style()) return annotated_image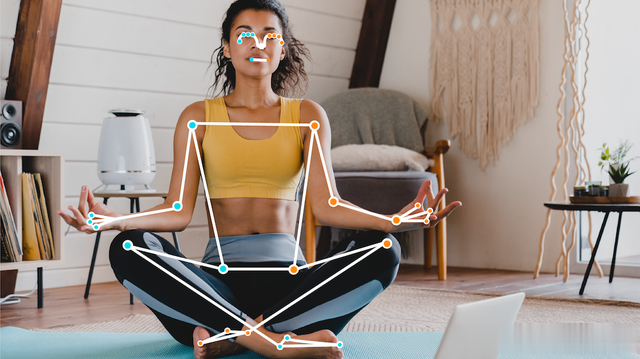
接下来就可以进行人体姿态的检测了。
import mediapipe as mpfrom mediapipe.tasks import pythonfrom mediapipe.tasks.python import visionbase_options = python.BaseOptions(model_asset_path='pose_landmarker.task')options = vision.PoseLandmarkerOptions( base_options=base_options, output_segmentation_masks=True)detector = vision.PoseLandmarker.create_from_options(options)image = mp.Image.create_from_file("image.jpg")detection_result = detector.detect(image)annotated_image = draw_landmarks_on_image(image.numpy_view(), detection_result)cv2_imshow(cv2.cvtColor(annotated_image, cv2.COLOR_RGB2BGR))首先使用BaseOptions函数来加载预训练模型,并使用PoseLandmarkerOptions配置相关的检测参数,其参数如下:
running_mode:配置检测的是图片,还是视频num_poses:需要检测的人体数量min_pose_detection_confidence:pose_detection置信度min_pose_presence_confidence:pose_presence置信度min_tracking_confidence:pose_tracking置信度output_segmentation_masks:是否输出mask的人体图result_callback:LIVE_STREAM视频流参数然后就可以使用detector检测器进行人体姿态的检测与估计了。detector检测器检测完成后,结果保存在detection_result中。其检测结果返回的数据如下:
PoseLandmarkerResult: Landmarks: Landmark #0: x : 0.638852 y : 0.671197 z : 0.129959 visibility : 0.9999997615814209 presence : 0.9999984502792358 Landmark #1: x : 0.634599 y : 0.536441 z : -0.06984 visibility : 0.999909 presence : 0.999958 ... (33 landmarks per pose) WorldLandmarks: Landmark #0: x : 0.067485 y : 0.031084 z : 0.055223 visibility : 0.9999997615814209 presence : 0.9999984502792358 Landmark #1: x : 0.063209 y : -0.00382 z : 0.020920 visibility : 0.999976 presence : 0.999998 ... (33 world landmarks per pose) SegmentationMasks: ... (pictured below)其数据是一个三维的数据坐标,只要得到了三维坐标,就可以使用可视化函数,进行数据的可视化操作了。
当然这里配置的output_segmentation_mask参数为true,因此模型也会输出人体检测的mask框,我们也可以可视化一下其人体检测的mask图片。
segmentation_mask = detection_result.segmentation_masks[0].numpy_view()visualized_mask = np.repeat(segmentation_mask[:, :, np.newaxis], 3, axis=2) * 255cv2_imshow(visualized_mask)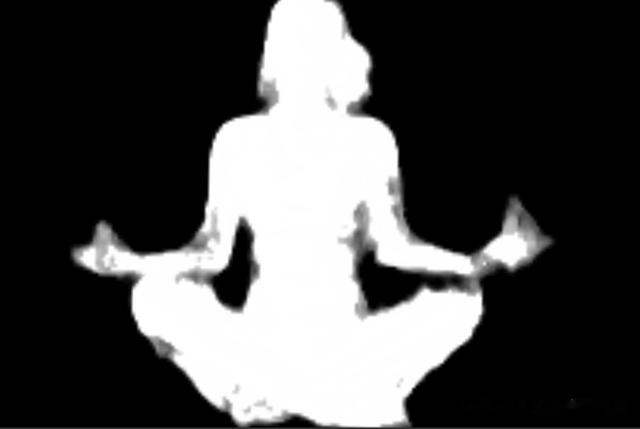
更多人体姿态检测:
人体33点坐标点:
0 - nose1 - left eye (inner)2 - left eye3 - left eye (outer)4 - right eye (inner)5 - right eye6 - right eye (outer)7 - left ear8 - right ear9 - mouth (left)10 - mouth (right)11 - left shoulder12 - right shoulder13 - left elbow14 - right elbow15 - left wrist16 - right wrist17 - left pinky18 - right pinky19 - left index20 - right index21 - left thumb22 - right thumb23 - left hip24 - right hip25 - left knee26 - right knee27 - left ankle28 - right ankle29 - left heel30 - right heel31 - left foot index32 - right foot index